During development, it is often necessary to record data on emails sent, when they were sent, and their content. During system development, recording data on sent emails, including the date and content, is crucial, as this helps monitor and improve the system’s performance and debug its behavior.
The mail logger performs this function. The module is a third-party extension allowing you to log all outgoing emails from your Magento 2 store. This module helps debug and troubleshoot email delivery issues and monitor the emails sent from your store.
To use the module, you will need to download and install it on your Magento 2 store. You can follow the installation instructions on the GitHub page we shared below. Once the module is installed, all outgoing emails will be logged, and you can access the log from the Magento 2 admin panel.
You can find a working module mail logger here:
Link 1: https://github.com/Eleanorsoft/m2-maillogger
Module logs all Magento 2 emails in var/mail folder. Each email is saved in a separate file with timestamp.
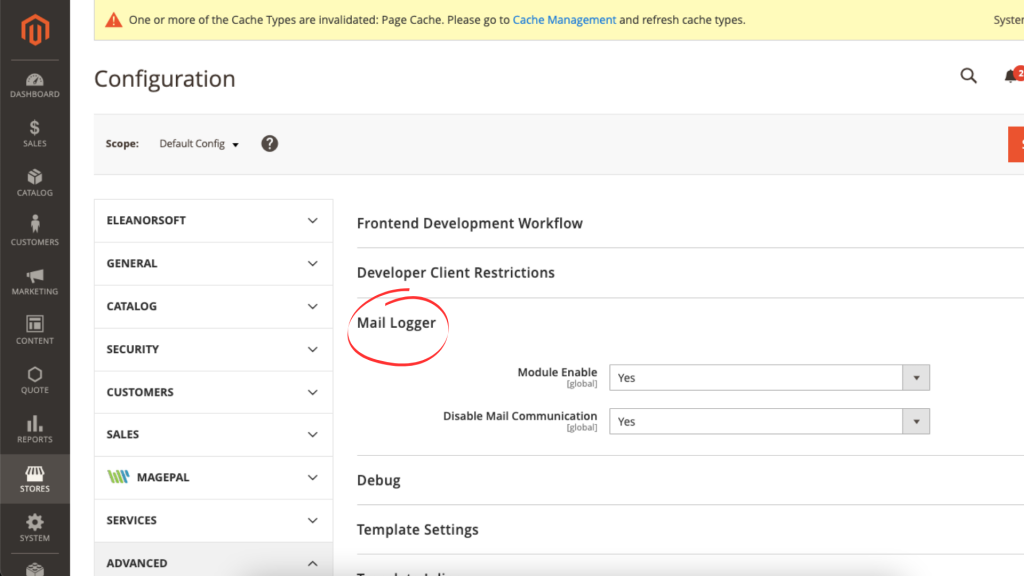
Default email communication must be enabled in order for this module to work correctly. You can disable real email using settings from the module.
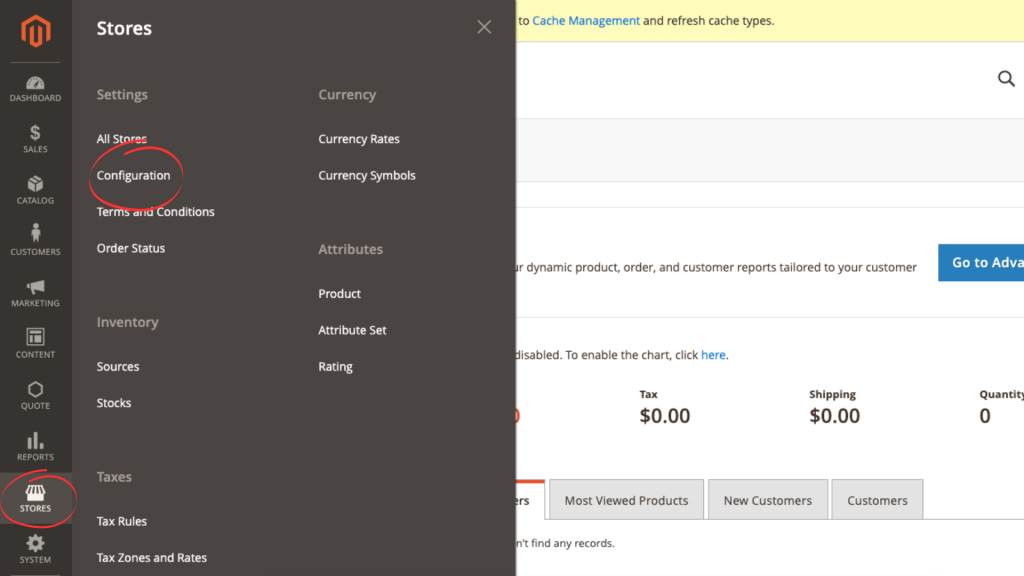
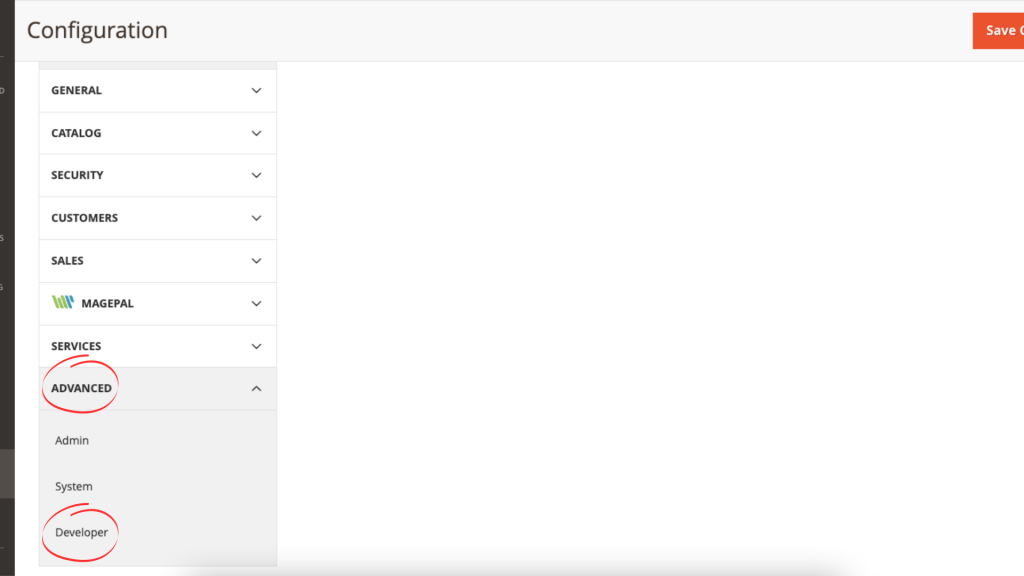
Let’s take a step-by-step approach to locate the mail logger in the settings.


Copy it to your app/code folder and run:
php bin/magento setup:upgrade
php bin/magento setup:di:compile
php bin/magento setup:static-content:deploy
The current version of the module benefits only developers, offering little value to web owners. However, the upcoming module version is set to change this. By incorporating a mail recorder, the module will help maintain safety and compliance and troubleshoot problems related to electronic mail or spam delivery. This functionality is especially critical for businesses that rely heavily on email communication with clients, such as those offering goods or services online.
You can ask questions to ELEANORSOFT specialists, receive professional help with the mail logger, and learn about collaboration terms by clicking the “Contact us” button.
GET IN TOUCH